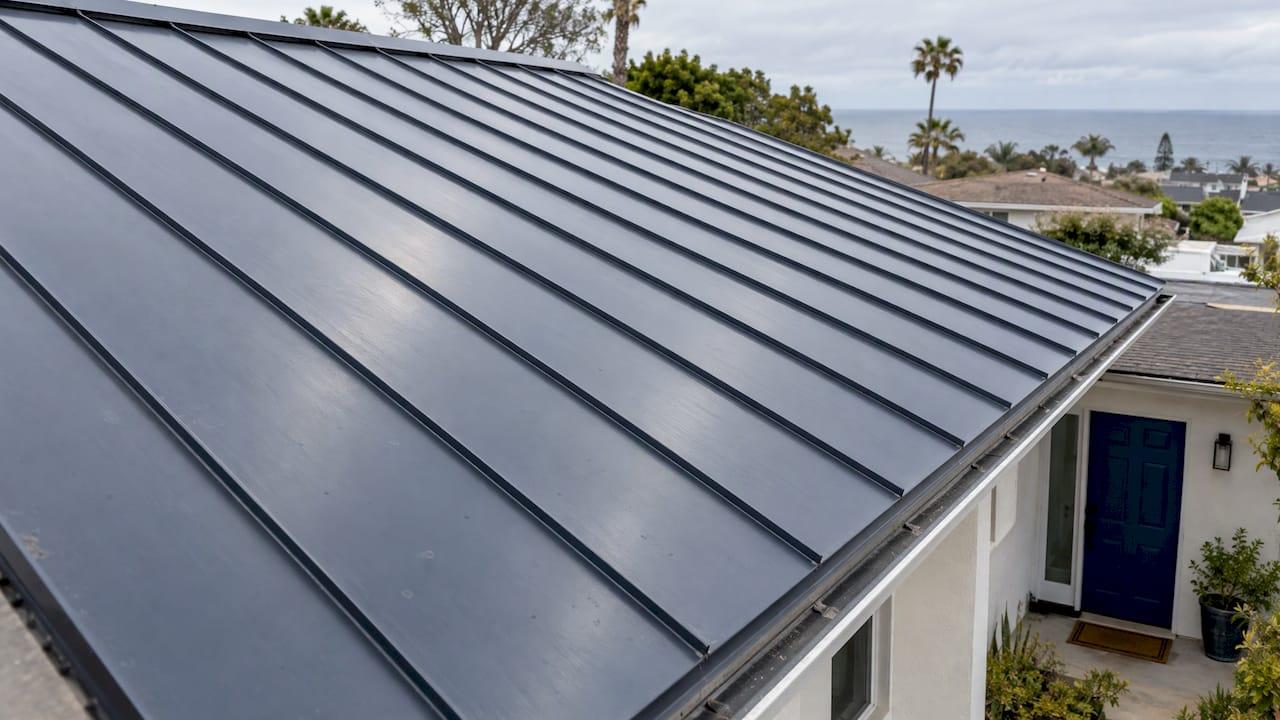
Most standing seam panels are 12 to 18 inches wide, and 16 inches is the most common. The number that matters for your roof is not the width of the sheet but its coverage width, the strip of roof each panel actually protects after the seams lock together. Below, we explain how the two differ, which width suits which roof, and how width affects layout, clips, waste and solar.
TL;DR
- Most standing seam panels run 12 to 18 inches wide, with about 16 inches the most common. Some snap-lock lines also come in wider or narrower variants.
- Coverage width is smaller than overall width because the seam overlaps. Always price and order by coverage.
- Width sets your panel count, where the last panel lands at a rake or valley, clip spacing and waste.
- Wider panels mean fewer seams and faster coverage. Narrower panels give a tighter seam rhythm and more clip points per square.
- On our San Diego coastal jobs we use a custom 18-inch snap-lock profile, fabricated to spec and backed by a lifetime leak-free warranty.
Table of Contents
- What “panel width” actually means
- Common standing seam widths in the US
- How width changes the look of the roof
- Layout: where width meets your roof dimensions
- Width, waste and material estimates
- Width, clips and wind
- Slope matters as much as width
- Planning for solar on a standing seam roof
- How to choose a width for your roof
- Our perspective
- A roof planned around your dimensions
- FAQ
- Sources
What “panel width” actually means
When a supplier says “18-inch panel,” two different measurements can hide behind that phrase.
- Overall width is the sheet from one edge to the other, including the rib and the leg that tucks under or over the neighbor.
- Coverage width (also called net coverage or net width) is the distance the panel adds to the roof once it is locked to the previous panel.
A typical snap-lock example: an 18-inch overall panel with about 1 inch of overlap per side covers 16 inches. Manufacturer documents state the figure the same way. One snap-lock panel guide lists net coverage widths of 16 or 18 inches with a 1-3/4-inch high snap-lock joint, and a mechanically seamed line is offered in 12, 16 and 20 inch coverages on one model and 13, 17 and 21 inches on another.
The practical rule: quotes, takeoffs and layouts should all use the coverage width, because that is the number that divides into your roof.
Common standing seam widths in the US
There is no single standard, but the market clusters tightly. The table below uses figures published by manufacturers in their own installation guides and product pages.
| Panel type | Coverage widths offered | Rib or seam height | Notes |
|---|---|---|---|
| Snap-lock, residential line | 12 in and 16 in | 1 in | 3/8-inch flat top for flashing attachment |
| Floating-clip panel | 12, 14, 16 and 18 in | 1-3/4 in | Clip allows expansion and contraction on longer runs |
| Snap-together panel | 12, 16 and 18 in | 1-3/4 in | Minimum slope 3:12 |
| Snap-lock, commercial-style | 16 or 18 in | 1-3/4 in | Lengths from 3 ft to 50 ft |
| Concealed-clip architectural panel | Nominal 24 in | 3 in | Taller rib, wider pan |
You will notice that 24-inch panels exist but belong to a different family, with taller ribs and typically used on larger or commercial roofs. For houses, 12 to 18 inches is the working range.
Why don’t standing seam panels get as wide as the exposed-fastener sheets you see at big box stores? A metals learning center explains that going wider would affect performance. It adds that some roll-forming machines can run panels wider than 18 inches, but the manufacturer or installer should verify the engineering still holds.
How width changes the look of the roof
Panel width sets the rhythm of the seams across the roof plane.
- 12 inches: a dense, vertical line pattern. It suits smaller roofs, curved or heavily detailed areas, and homeowners who want a strong architectural look.
- 16 inches: the balanced default. Seams are visible but not busy, and the panel is easy to handle on a residential pitch.
- 18 inches: fewer seams and fewer panels to hang, a calmer, broader look on big uninterrupted slopes.
None of these is better in the abstract. The right width depends on the roof’s shape, the wind exposure and how the panel is fastened. Narrow panels on a complicated roof can reduce awkward cuts. Wide panels on a long, clean gable can cut install time.
Layout: where width meets your roof dimensions
Here is where width becomes a real-world decision. Panels start at one edge and march across, so the roof’s width divided by the coverage width decides whether you finish with a full panel or a sliver.
A layout guide gives a simple example: an 18-inch panel on a roof 182 inches wide leaves a small two inch gap at the end. The fix is to adjust the starting point, trim panels, or choose a different width so the last panel is a reasonable size.

Plan the last panel first
The Bryer install manual notes that at the end of a run the last panel may be too wide and will need to be ripped lengthwise. It is measured to within about 1/2 inch of the edge, with 1 inch added for a 90-degree turn-up.
A few habits make this painless:
- Measure the roof plane at the eave and the ridge, not just once. Few roofs are perfectly square.
- Divide each measurement by the coverage width and look at the remainder.
- If the remainder is tiny, shift the starting line or split the difference between both rakes so the first and last panels are close in width.
- Check how the edge panel meets trim, a valley or a hip before cutting.
Hold the coverage width to tolerance
Accuracy matters across a whole roof, because small errors stack. One installation guide states that panels must be held to the designated width within 1/8 inch per panel, and that drifting outside the tolerance can cause faulty seams. Across 25 panels, an eighth of an inch each is more than three inches of drift. A crew that checks the coverage line regularly catches it early.
Width, waste and material estimates
Wider panels do not automatically mean less waste. Waste comes from panel length, roof geometry and how cut-offs can be reused.
- A sample cut list for a 16-inch panel shows waste ranging widely depending on panel length, from under 2% to over 16%. The takeaway: lengths that fit the sheet or coil efficiently matter more than the width alone.
- A materials calculator guide advises 5 to 8% waste for simple gables and 10 to 15% for cut-up hip or valley roofs.
Because standing seam is typically roll-formed to the length of each run, fabricating to spec cuts down on waste compared with stocking fixed lengths. That is one reason we fabricate panels for each project rather than order generic sheets.
Width, clips and wind
Panel width interacts with how the roof is held down. Standing seam panels are attached with concealed clips along the seam, so a narrower panel has more seams, and therefore more clip lines, across the same roof.
Clip schedules come from the manufacturer’s tested assemblies. As one example, a residential install manual lists a UL 580 Class 90 assembly for panels up to 16 inches wide on 5/8-inch plywood: one clip type at 36 inches on center with 2 screws per clip, and another with fixed clips at 36 inches on center or floating clips at 48 inches on center with 4 screws per clip. Those numbers apply to that specific assembly, not to every panel, so your roofer should follow the schedule for the exact panel, gauge and substrate being installed.
Corners and edges see higher wind loads. One application guide explains that these zones can be handled by substituting a higher capacity clip while keeping the field spacing, and that stronger seams can be used the same way in zones needing more strength. For coastal homes, that is the reasoning behind choosing a panel and clip system together instead of picking a width by looks alone. For more on this, see our guide to wind resistant roofing.
Expansion and long panels
Metal moves with temperature. The Bryer manual says the longer the panel and the bigger the temperature swing, the more it moves. Panels under 25 feet do not move enough for thermal expansion to cause problems even if fixed in several places, but on longer panels it matters more to fix them in only one location. Floating clips exist for this reason, and one manufacturer describes its floating clip as allowing expansion and contraction on longer lengths. Width does not change this, but a long, wide panel is a larger surface that needs to slide freely.
Slope matters as much as width
Width and slope are often discussed together because the seam type decides how low you can go. One snap-together product lists a minimum slope of 3:12, while a mechanically seamed, taller rib system is the kind of assembly used on very low slopes. If your roof is shallow, read our piece on low slope metal roofing before you settle on a profile.
Planning for solar on a standing seam roof
Standing seam is popular under solar because the raised seams let installers clamp to the roof without drilling through it. The Bryer manual recommends S-5! attachment solutions for solar and snow retention on standing seam, noting that they avoid unnecessary penetrations and maintain the finish warranty.
That has a layout consequence. Clamps attach to seams, so seam spacing, which is your panel coverage width, sets where the rails and arrays can land. Before you choose a width:
- Map where the array will sit and where the seams fall under it.
- Keep vents, skylights and chimneys out of the array footprint where you can.
- Confirm that the panel’s seam profile suits the clamp your solar installer plans to use.
Small gaps and fit-up decisions matter on the solar side too, and this explainer on why solar panel gaps matter covers the spacing that keeps a home system tidy. Because we handle roofing and solar integration together, the panel width and the array layout are planned on the same drawing. You can read more in standing seam metal roof and solar in San Diego.
How to choose a width for your roof
Use this short checklist when you compare proposals.
- Ask for coverage width, not overall width. Every quote should state it.
- Check the roof’s dimensions against it. Ask where the last panel lands on each plane.
- Match width to exposure. Windy, salt-air sites benefit from a panel and clip system designed together.
- Think about the solar plan. Seam position drives clamp position.
- Ask how the panels are made. Roll-formed to your measurements means fewer joints and less waste than stocked lengths.
- Match the look. Narrower for detail, wider for calm sweeps.
If you are still deciding between profiles, our comparison of standing seam or corrugated for homeowners lays out the differences, and our standing seam metal roofing page shows the system we install.
Our perspective
Width is a design decision, not a catalog number. On the coast, the wind and salt air do the testing, so we start with the roof’s exposure and work backward to the panel.
That is why we fabricate panels to custom specifications and run an 18-inch snap-lock profile designed for coastal conditions. We measure each roof plane, plan the last panel before the first one goes up, and coordinate the seam layout with any solar array so nothing needs to be drilled through the finished roof.
Our installations are not subcontracted, so the crew that lays out the panels is the crew that hangs them. Our work is backed by a lifetime leak-free warranty, and we would rather spend an hour on layout than a day correcting it.
Marcus
A roof planned around your dimensions
We fabricate custom standing seam panels for homes, multi-unit buildings and commercial roofs in San Diego, including the 18-inch snap-lock profile built for coastal wind and salt air. Roofing and solar integration are handled by one team, and the work carries a lifetime leak-free warranty.
If you are replacing a roof, our metal roof replacement service is published at $40,000 to $60,000 as a one-off project price. To talk through width, layout and solar for your home, start at SW Metal Roofing.
FAQ
What is the most common standing seam panel width?
Sixteen inches of coverage is the most common, within a typical range of 12 to 18 inches according to a metals learning center. Many product lines offer 12, 16 and 18 inch options. Wider architectural panels of around 24 inches also exist, mostly for larger buildings.
Is a 16-inch panel really 16 inches wide?
The 16 inches is the coverage width, meaning the strip of roof one panel protects after the seam locks to its neighbor. The sheet itself is wider because of the overlap. An 18-inch overall panel with 1 inch of overlap per side covers 16 inches, so use coverage width for all layout math.
Does panel width change how many clips I need?
Yes, indirectly. Narrower panels create more seams across the roof, so there are more clip lines. Spacing along each seam comes from the manufacturer’s tested assembly for that panel, gauge and substrate, so the installer should follow it rather than a rule of thumb.
Can I put solar on standing seam panels?
Yes. Seam-mounted clamps let solar attach without roof penetrations, and one install manual recommends this approach to preserve the finish warranty. Plan the array and the seam spacing together, ideally with the roofer and solar installer on the same layout.
Sources
- What Is Standing Seam Metal Roofing? Comparisons, Types, and More
- Easy-Lock Installation Guide
- Versa-Span Installation Guide
- MS-100 and MS-150 Installation Guide
- Central Snap documentation
- LokSeam snap-together standing seam roofing
- TS-324 panel installation guide
- BigbeeLok-324 product application guide
- Residential Standing Seam Install Manual
- Why solar panel gaps matter for your home system